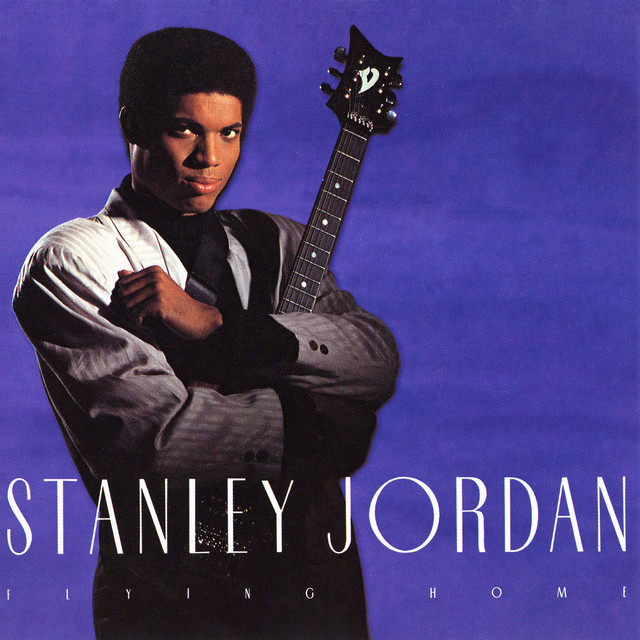
For a long time, I’ve been familiar with Stanley Jordan’s music. When I was a teenager in the late ’90s, he was a major topic among guitarists and everyone was impressed by his unique tapping technique. As I’ve been exploring gems of 80s jazz fusion lately, I decided to revisit one of Jordan’s early albums, Flying Home (1988), since I had mostly known him through his pop covers and standards. What I discovered is Jordan at his best: a super-groovy, beautifully crafted album that I can listen to over and over again. Sure, the record is full of 80s drums and synths, and for some listeners that might feel like an overdose—but if you listen closely, you’ll notice just how wild his guitar sounds. I also sense the influence—or at least the broader zeitgeist—of African-American guitarists like Hiram Bullock and Paul Jackson Jr., reflected in the pentatonic language and distinctly funky 80s aesthetic.
Sure, his guitar timbre is unique thanks to his tapping technique, but let’s not focus solely on how he plays the guitar—let’s pay attention to what he plays, especially when he ventures outside. Below are my comments, with some analysis and transcribed phrases from four selected tracks (1, 2, 4, and 8)
Track 1: Street Talk
Harmony
Section A: | Dm7 Bbmaj7 | Gm7 C7(13) |
Section B: | Dm7 | G | Bbmaj7 | A7 |
Section C: | Bbmaj7 | Gm7 | E7(+9) | A7(b13) |
Structure
| A 4x | B 4x | C |
| A 8x | B 4x | C |
| A 4x | B 2x | C |
break… (| Dm | Dm C7 |)
| A 16x+ (fading out) |
Note: The B section is always used for improvisation. Clever!
Transcription (to standard tuning)
0’50” Impro

This section reveals much of Jordan’s soloing approach on this album. I can’t transcribe his exact fingering—his guitar is tuned E–A–D–G–C–F in symmetrical fourths and he mixes his phrases using 2 hands—but I’ve tried to make these lines as natural as possible in standard tuning. Starting from a D minor pentatonic (box 1), the phrase connects to the harmony with a swept Bbmaj7 arpeggio that descends chromatically. From there, seeking dominant tension, it moves into a diminished arpeggio that morphs into an altered A arpeggio, resolving back to D minor. But it doesn’t stop there: the line continues, briefly touches the 9th, and settles into a looping pentatonic idea. Finally, Jordan steps outside with a Db arpeggio over the Bbmaj7—likely because he was already leaning on the blue note (b5), which here functions as the arpeggio’s 5th and provides an easy exit from the key. The same idea reappears at the very end of the track (around 4’10”).
Track 2: Tropical Storm
Harmony
Section A: | Bm11 | Em7(9) F#m7 |
Bridge: | A7(4/9) | B7(4/9) |
Section B: | G6 | A7(13) A7 |
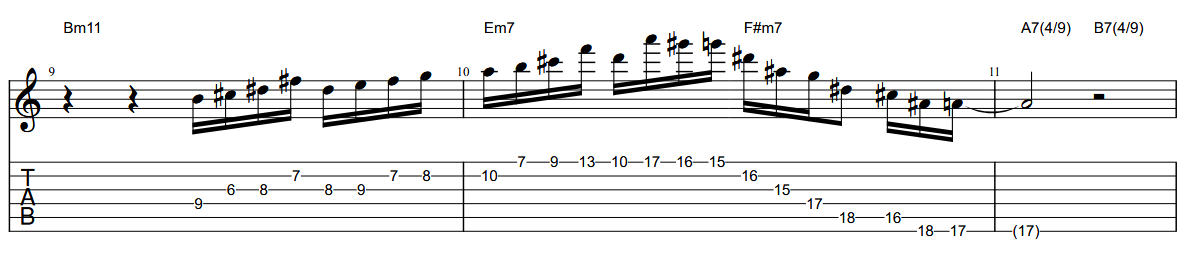
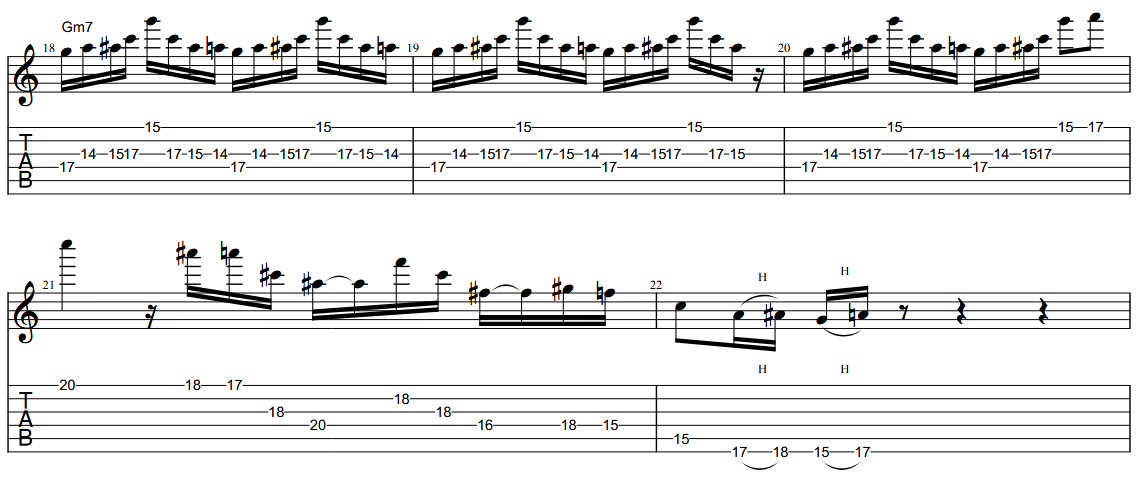
0’38” First Impro

I find this motif super cool. It begins as a simple Bm7(9) arpeggio, which Jordan then develops using Gmaj7 in bar 3. It reappears later as Gmaj7 over Em7(9) and Dadd9 over F#m7 in bar 6. The section wraps up with some crazy-fast tapping over a D major arpeggio.
1’20” Impro (moving from Section A to Bridge)
Here he steps slightly outside the key by briefly replacing the minor 3rd with a major 3rd, implying a dominant colour—essentially a Mixolydian ♭6 sound—over the Bm harmony. He then pushes the tension further with a “sinister” Eb7(#11) arpeggio over Em7, before landing cleanly on A as the line enters the bridge.
Track 4: Can’t Sit Down
Harmony
Section A: | Gm7 | (at 2’04” there is also a hint of Aaug)
Section B: | Gm7 F7 | Bb C7 |
Section C: | Gm7 | C7 | Ebmaj7 | F7 |
| Gm7 | C7 | Ebmaj7 | D7(+9) D7(b9) |
2’04” Section A Impro
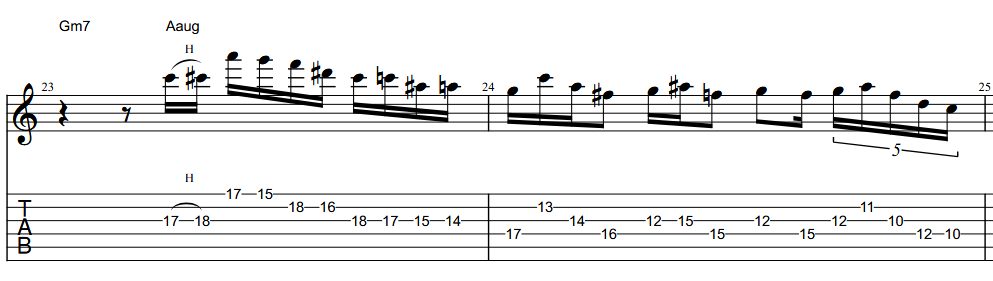
These outside phrases sound like they touch on Bb melodic minor—so in the key of G, that suggests the Lydian Augmented (#5) colour, giving the line an altered-major quality, though not in a strict scalar sense. Still, it’s easier to hear the underlying intention as a momentary circulation of an altered A7 sonority—something like Aaug or A7(b13)—superimposed over Gm. In other words, he’s briefly adding a kind of V/V colour to the harmony before resolving back.
After that, he seems to move through a set of instinctive arpeggio shapes that suggest shifting harmonic colours without fully committing to any single scale. It almost feels spontaneous, yet everything lands perfectly. I didn’t transcribe the last few ideas because I’m not entirely sure what he’s outlining… so if you have any thoughts, feel free to comment!
2’45” Section A Impro (returning from Section C)
The lick here starts as a simple looping line over Gm9, but then he suddenly breaks away from the key and launches into an altered arpeggio—essentially another variation of an altered A7 sound, though with a few spontaneous notes thrown in. Pretty cool!
Track 8: The Time is Now
Intro
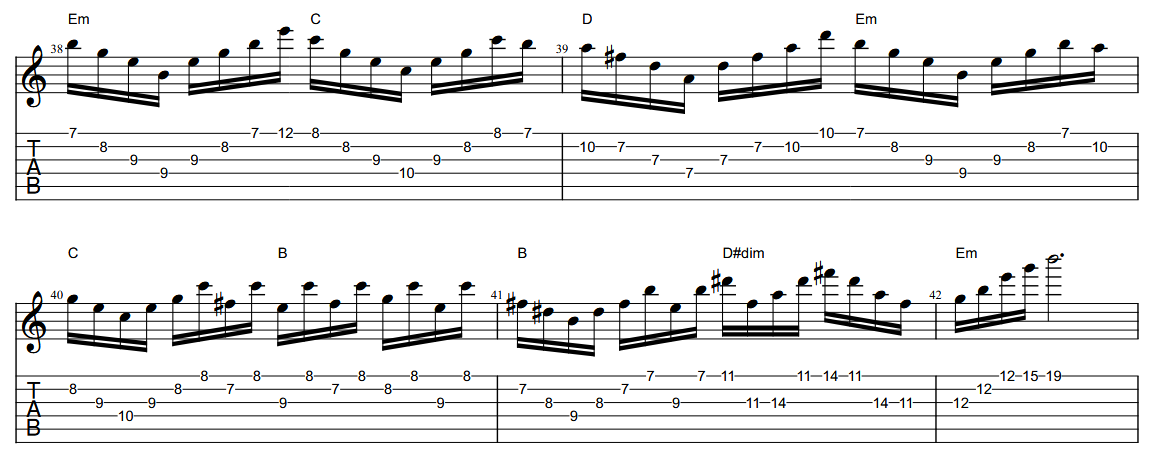
This passage sounds almost like neoclassical guitar, no one would ever guess it’s Stanley Jordan playing! But it is! And this overdriven line appears only once, right at the intro of the tune. I found it so brilliant (especially with the synth bass underneath) that I had to transcribe it as well. The rest of the track returns to a style more in line with the other tunes on the album. It’s a very curious intro, and it makes me wonder why he chose to open the piece this way before shifting into a more traditional jazz feel.
Final Words
Flying Home turned out to be far more adventurous than I expected. Revisiting Stanley Jordan beyond his famous pop covers opened up an entire world of harmonic curiosity, rhythmic drive, and fearlessly creative improvisation. What I enjoyed most while diving into these phrases is how naturally he blends theoretical complexity with instinct. Sometimes he’s clearly drawing from altered colours; other times, he just follows the shape under his fingers and somehow lands exactly where he needs to. That mixture of intention and spontaneity is, in many ways, the essence of his style—and perhaps what makes this album such a gem.
I hope this breakdown inspires you to listen (or re-listen) to Flying Home with fresh ears, and maybe even experiment with some of these ideas in your own playing. I also recommend watching the one video online where he plays a tune from this album, it’s a fantastic performance, and it’s amazing to see the theme and some impro played in octaves. See below!